Animation in PowerPoint can add a lot of fun to your presentation. It’s not that difficult to figure out and it’s fun to play with. However, it’s best to use this feature when it is appropriate for your content. Too much animation, and your presentation can appear silly or be difficult to watch. For this PowerPoint tutorial, I will show you how to create a Path Animation within your presentation. This feature works best for flowcharts. If you are trying to convey one thing leading to the next, adding this animation will help your audience understand the process better.
PowerPoint Tutorial: How to Make a Path Animation
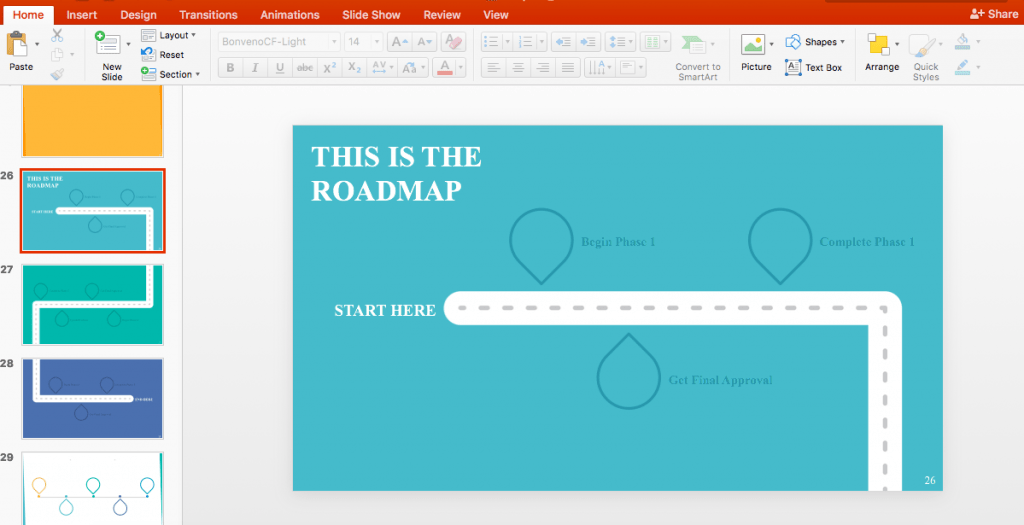
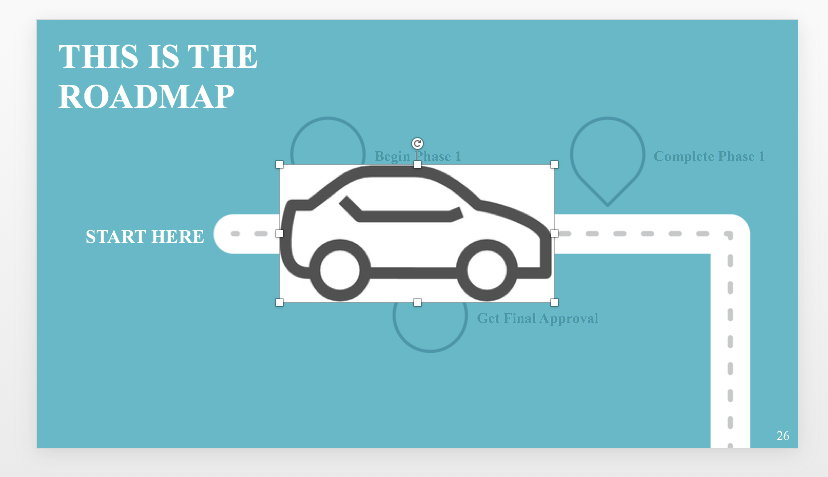
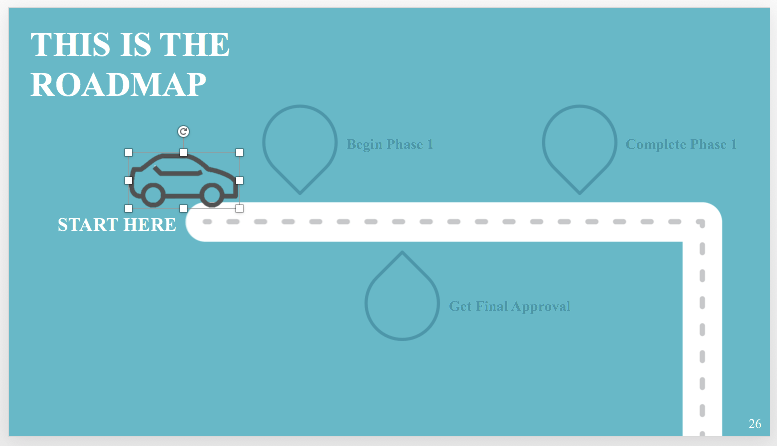
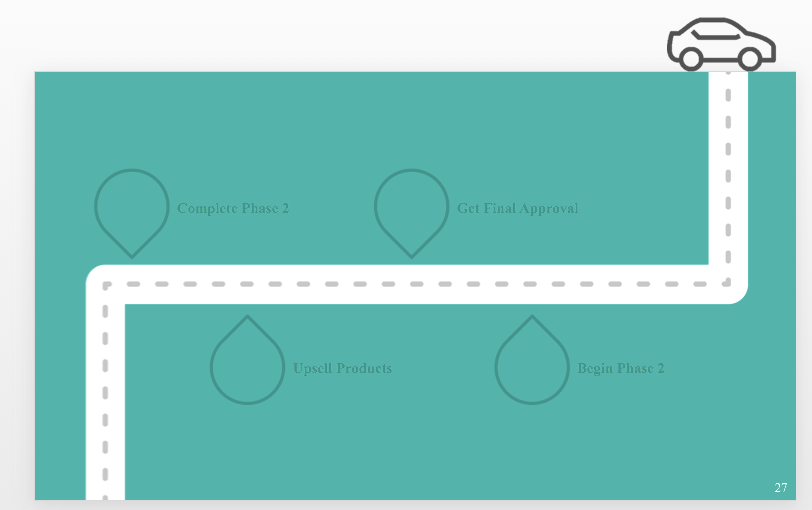
For this example, I have a roadmap for a project. I want to show how to complete each step in the project to get to the final product.
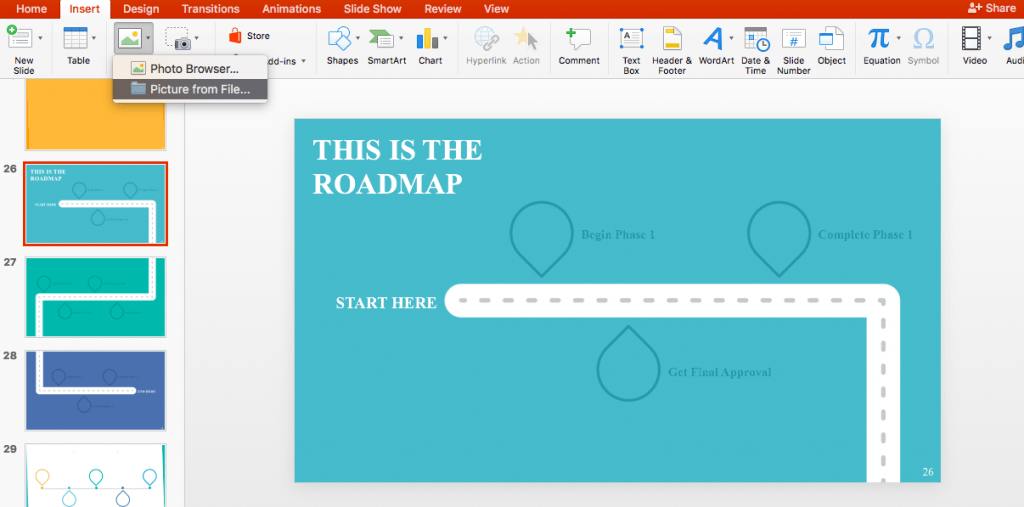
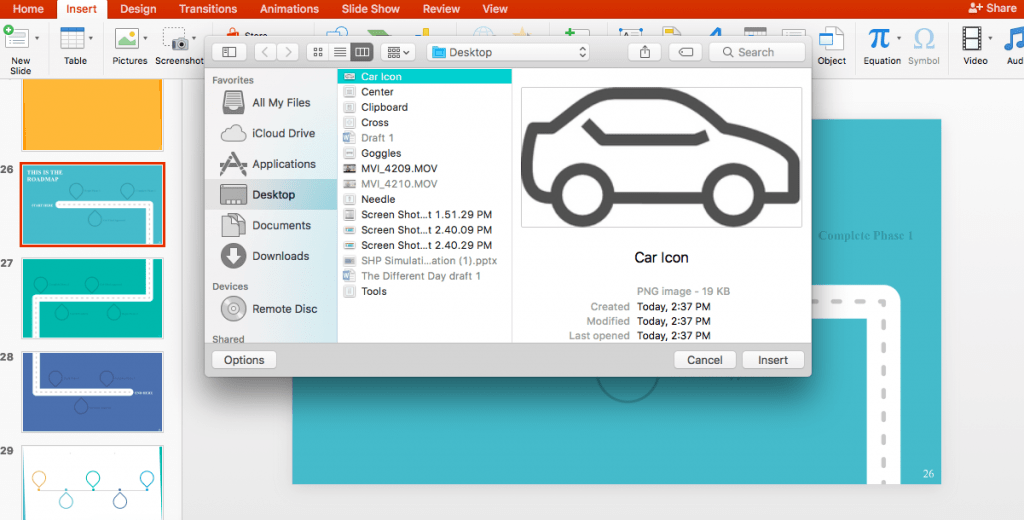
Obviously, I want to use an image of a car driving along this road. I already have an icon of a car saved on my computer. You can find your own on websites like iStock.com. I am going to insert this image by going to Insert > Picture > Picture from File. Then I will select the image of the car icon, which is saved on my Desktop.
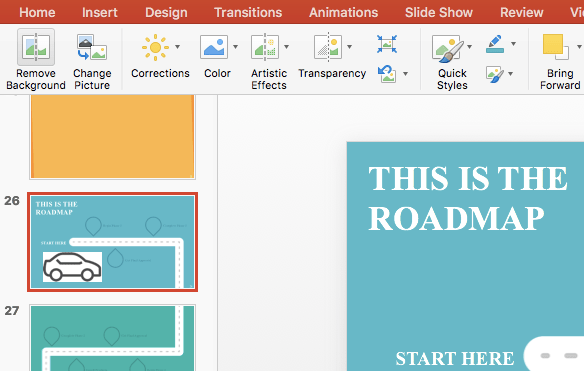
With the image on my slide, I can see the white background. I want to get rid of that so that it’s just the car.
To get rid of the background, go to the Picture Format menu and click on Remove Background.
You will see this box pop up with instructions. Click and drag the corners of the box inside the image to the outer lines of the car.

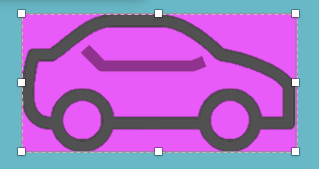
Click on the top corner of the line inside the car to select it as well.
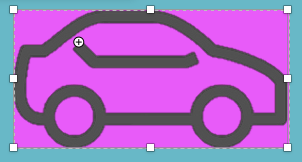
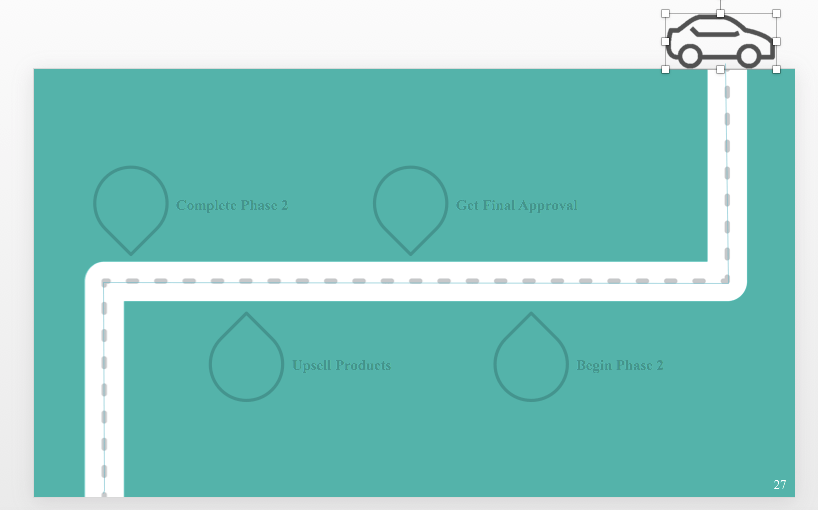
Press the Enter/Return key and the white background will disappear. Now, I will resize the car and place it at the beginning of my road.
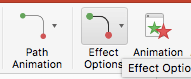
Now I can begin to play with animation. The goal here is to make the car travel down the road throughout my three slides. With the image of the car selected, click on the Animations tab.

The first options are for how you want the car image to first come onto the slide. I selected Appear, so that when I click on this slide in Presentation mode, the car will simply appear. You can try out these other options to see which one you like the best.
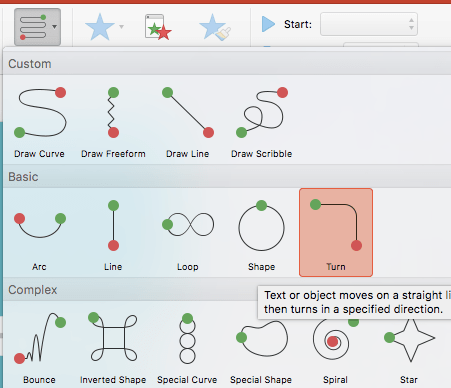
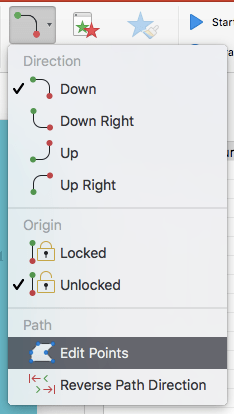
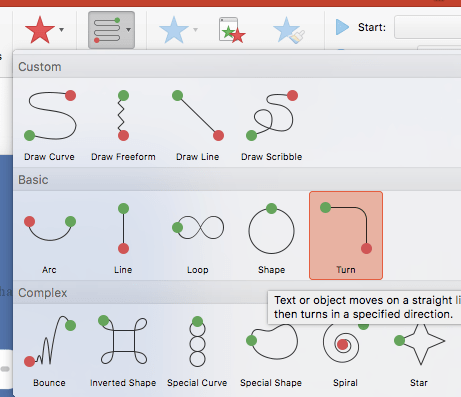
To make the car move down the road, click on Path Animation. A drop down menu will appear with several different paths to pick. Since I want the car to make a turn, I will select the Turn option.

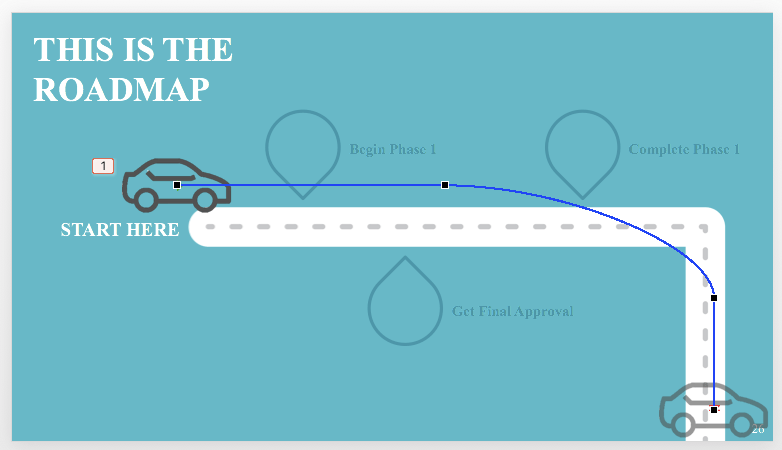
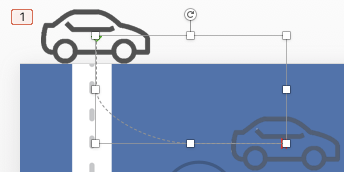
When the Path Animation first appears on the slide, it will be tiny. I need to stretch out the box to make it bigger. Select the top corner and drag it out until it falls along the road.
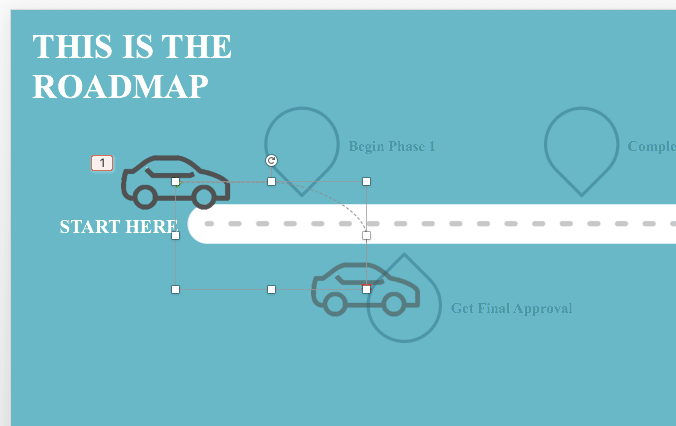
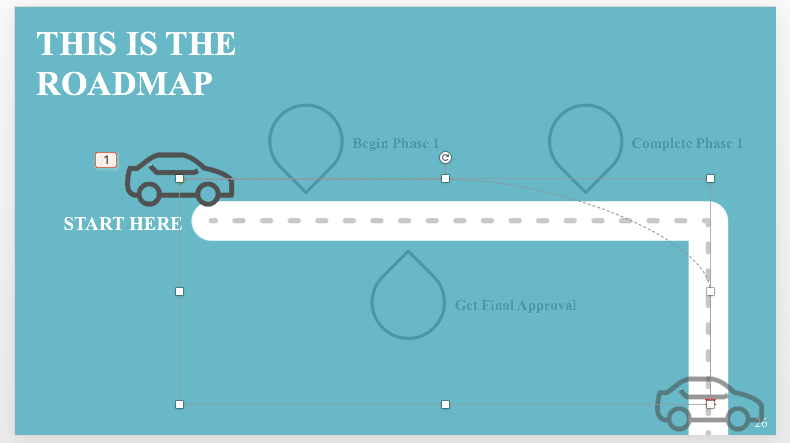
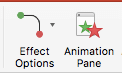
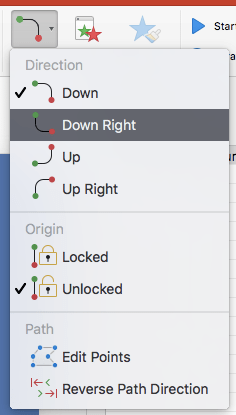
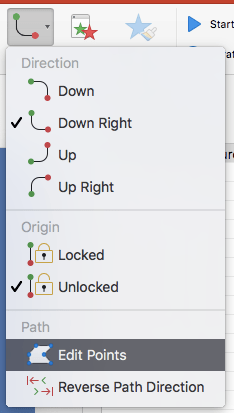
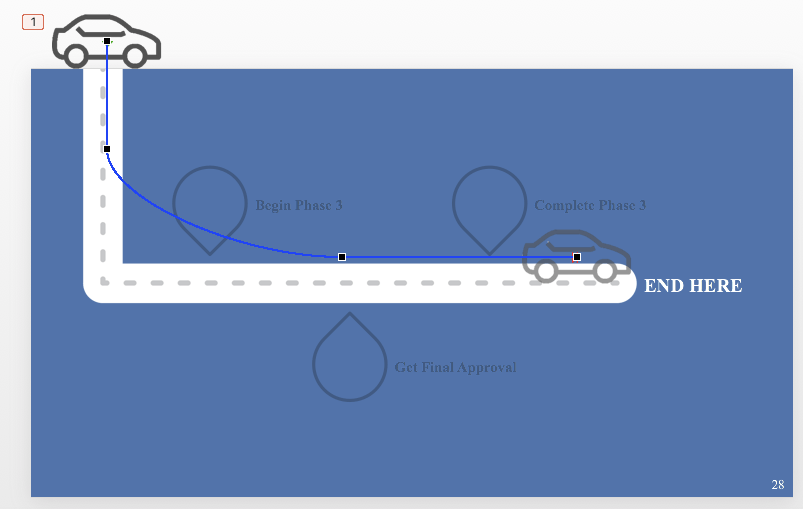
Now the Path Animation travels along the road, but it doesn’t hug the curve tight enough. I need to edit the path to line it up exactly with my road. To do this, go to Effect Options and select Edit Points.
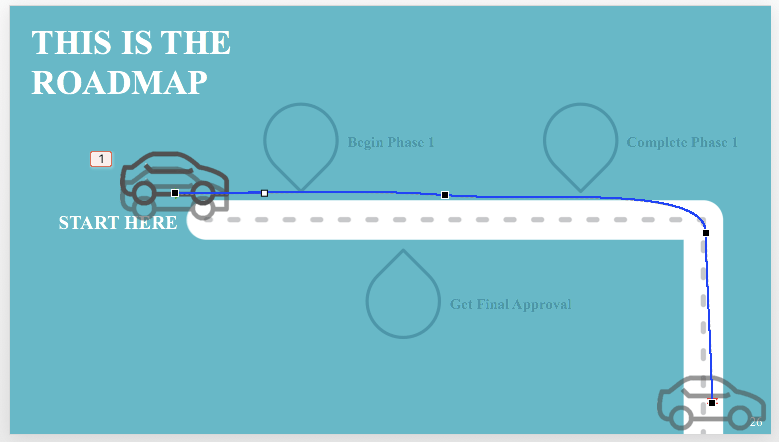
Now I can drag out points on my line to match the road on the slide. Just click the black box and the blue line will begin to move around.
To playback the animation at any time, just press Play All in the Animation Panel. You can watch the car move along the road, now this needs to continue to the next slide. You can insert the image like I showed you earlier, and erase the background. Or copy the image by selecting it and hold down the Command key and the letter C. Paste it at the very top of the road, just outside of the slide.
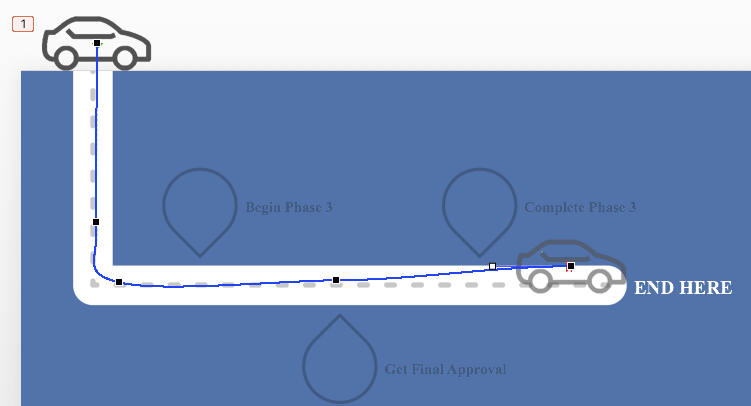
I will use the Path Animation tool again, but this time I will select Draw Freeform since our road is a zigzag.

With this option, I can draw out the animation however I like. To fit it along the road, I click at the top where my car is, down to the first turn. Then I click to the second turn, and then to the bottom of the road where the slide ends. If you look closely, you can see a light blue line on the road; that’s my Path Animation. Press the Enter/Return key to create the animation.
PowerPoint will automatically play the animation, and I noticed the car moves really fast. To slow it down, I can adjust the duration at the top right corner of the Animations toolbar.
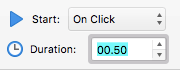
You can either type in a number or click the arrows to speed it up or slow it down. Play around with this until the car moves at a speed that you like.
The second slide is done. I need to create this animation on last time for the third slide. Again, I will copy my car icon and place it just outside the very top of the road on the third slide.

Since the car only makes one turn, I can use the same Turn feature as I did the first time.
PowerPoint will automatically drop in a down turn effect, but the car needs to go the opposite direction. It’s a simple fix. Click on the Effect Options menu and select Down Right.
I can see the tiny little right turn appear. I have to resize to fit my road and edit the points again.
By clicking on the black boxes, I can move the blue line along my road so that is hugs the turn tighter.
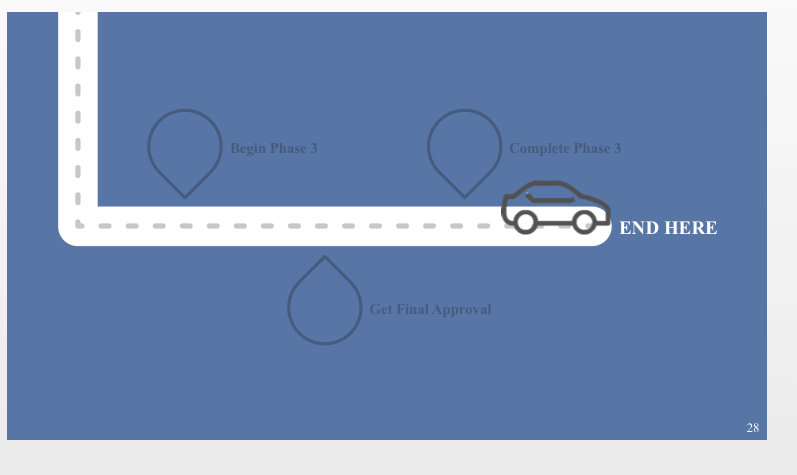
Now I’m done! I can watch my car travel along the road through each slide with the click of the mouse!
For more PowerPoint tutorials and tips for your presentation, check out these posts on the Ethos3 YouTube channel:
Presentation Design Tutorial: How to Use Photoshop with PowerPoint [Video]
PowerPoint Tutorial: How to Color Overlays with Photos [Video]
Presentation Design Tutorial: How to Integrate Type into Photos [Video]
