The Complete Guide To Creating A Captivating Professional Presentation
.
Do you have a presentation in the near future, but don’t know how to start preparing for it?
You’re in luck! Included below are 10 steps to help you create a truly captivating presentation, and avoid creating a conference room killer – the infamous, dreaded Death By PowerPoint presentation.
If you work through each of the 10 steps below, as well as watch the included videos, and review the embedded resources, you will have all of the information you could ever need to create a stunning, professional presentation, instead of a boring conference room killer presentation.
The key to success is starting early so you have ample time to complete each of the 10 steps thoughtfully. So go ahead and begin immediately; don’t delay. These tips will help you start, and finish your presentation like a presentation professional.
If you have questions about any of these tips, contact us. We’re here to help you create amazing presentations!
10 Steps To A Captivating Presentation
1. Describe your presentation in one sentence

Simplify your presentation topic to a one-sentence summary before you begin writing or designing your presentation. If you cannot explain your presentation in one sentence, you are not ready to create your presentation.
The one-sentence description serves as a compass during the content development process, making it easy to explore supporting ideas without getting lost in the sea of possibilities.
If you think your idea is too big for a one-sentence summary, consider that Daniel Pink, the chief speechwriter for Vice President Al Gore from 1995 to 1997, and author of three New York Times bestsellers, suggests writing a one-sentence summary for the purpose of your life. If it is possible to define your life in one sentence, it is undoubtedly possible to encapsulate any presentation in one sentence.
Pink derived inspiration for his advice from a story about Clare Boothe Luce, the first American woman to represent her country to a major world power. In 1962 Luce said to John F. Kennedy, a great man is one sentence. Luce advised Kennedy to write a one-sentence summary. She was telling him to concentrate, to know the great themes and demands of his time and focus on them, according to the Wall Street Journal article, To-Do List: A Sentence, Not 10 Paragraphs.
Summary: Write one sentence that describes your presentation topic. Think of the one sentence as your elevator pitch for your presentation. If you were riding the elevator to go up only one floor, how would you explain your presentation to someone in that short amount of time? This is your one sentence statement, and the heart of your presentation.
Resources:
The Shocking Secret To Awesome Presentations
The Advice I Give To All TEDx Speakers
The TED staff answers: What Makes A Great TED Talk?
2. Identify the 3 main takeaways of your presentation.

Once you have clearly defined your presentation topic with a one-sentence statement, your next step is to identify the three main ideas of your presentation. These three ideas will be the pillars of your presentation.
To identify the three pillars, ask yourself, “If the audience will only remember three things about my talk, what do I want those three takeaways to be?” Ask yourself this question because most likely audience members will indeed only remember three ideas from your entire presentation. You will build the rest of your presentation around these three pillars, which ultimately support your core message as defined in your one sentence summary.
Every element of your presentation should, in one way or another, connect to one of your main three ideas. If you are considering including an element that cannot be directly linked to one of your three pillars, ask yourself, “Is this really necessary?” If you decide that you absolutely must include something that seems to not connect to one of your three main ideas, consider reframing the seemingly unrelated point so it can connect to one of your three main ideas, or consider changing your selected three pillars.
Summary: For inspiration, think of the Latin phrase Omne trium perfectum, which means everything that comes in threes is perfect, or, every set of three is complete. No matter the topic or length of your presentation, the “rule of three” should be used to structure your presentation content. By only providing three main takeaways, your presentation will be easier for your audience to remember, and your main points will be easier for you to recall when you’re presenting.
Resources:
The Science of Memorable Presentations
Too Much Information Can Ruin Your Presentation
Simplify Your Language To Sound Smarter in Presentations. Here’s Why.
3. Get Real.

After you have sculpted your one sentence summary and three pillars, start developing your content to support your three main ideas. Your supporting content is your opportunity to talk about your research, data, and case studies.
According to a Buffer article, one study published in Communication Research found that a whole week after reading, passages with statistics were more persuasive than passages driven by story. As you will read later, this claim is disputed, and many people think stories are more persuasive than data. Don’t worry about which is more important though because you will need both. Thus, if you have some data to prove your points, select your strongest stats, and use them to add weight to your ideas. Just don’t overdo the data. Get to the point, and keep moving so you don’t lose your audience by wading through unnecessary details.
As you construct your first draft of your supporting content, continually ask yourself, “So what?” Many audience members will listen to a presentation, process the information, consider the points, and then think, “What’s in it for me?” or “Why does this matter?” Basically, they are thinking, “So what? Why should I care?”
You need to drive home the value of your material throughout your entire presentation. If you would be unable to respond to an audience member who asked, “Why should I care?” in response to a particular piece of your content, delete that point. Every point should be relevant to your message, and your audience. If you do not answer these questions, some audience members will probably think your presentation was a waste of their time.
When considering your answer, think about what keeps your audience up at night. What are their problems, concerns, and challenges? Can your insights and ideas solve a problem for them?
As you continue to develop the supporting elements of your presentation, keep a “devil’s advocate” mindset. Once you have ensured all of your points will be meaningful to your audience, review your content from perspective of an audience member with an opposing viewpoint.
For example, it might seem like no one could argue with a presentation that proposed the idea of giving away food to prevent hunger. However, don’t forget the saying, “Give a man a fish, feed him for a day. Teach a man, feed him forever.” Sharing food is a noble mission however there will still be someone who disagrees with your solution to the problem. Develop your content to sway audience members with opposing viewpoints.
Summary: Support your presentation with facts that will resonate with your audience, including any disagreeing attendees. In addition, clearly answer “So what?” for the audience. No presentation is exempt from this requirement. Get real, and cut the fluff.
Resources:
How To Create A Presentation Your Audience Will Love
The Complete Guide to Knowing Your Audience
The Most Important Word For Public Speakers To Use During Presentations
3 Tips for Writing Compelling Presentation Content
4. Find Your Story.

At this point you have defined your presentation with one sentence, identified the three pillars of your topic, and crafted your supporting content to satisfy challenging perspectives.
Take a good look at all of these elements and then step away from working on your presentation. This is the time to do a little soul searching. Go for a walk, write in your journal, or engage in other activities that will open your mind to inspiration.
Search your memories until you remember a story that easily relates to your presentation topic. No presentation is complete without at least one story so don’t skip this step.
Storytelling is an important part of all presentations because many credible sources claim stories are easier to recall than stats or facts. Descriptive tales can activate up to 7 areas of the human brain, while non-narrative information typically activates only two areas of the brain.
With so many areas of the mind engaged, listeners experience the story instead of process it. In addition, a carefully crafted story will likely inspire emotional reactions from audience members. Emotions, not logic, inspire most actions.
So, not only will audience members remember a story more easily than facts, a story is also more likely to inspire action. Since all presentations need a call to action, the more you can inspire your audience to take action, the more successful you will be as a presenter.
Learn more about the power of stories for presentations by reviewing the infographic below.
Summary: Tell at least one story during your presentation. Don’t settle for just any story, though. Take the time to select a relevant story that will spark an emotional response within audience members. To inspire action, speak to the heart as well as the mind.
Resources:
3 Storytelling Tips from Acclaimed Writer Burt Helm
How To Find A Story To Enhance Your Public Speaking Presentations
How To Prepare A Story For A Business Presentation
Watch These Videos To Improve Your Storytelling During Presentations
5. Identify a clear call-to-action.

Now that you have developed content that guides your audience to a new perspective, decide what you want the audience to do next.
Do you want your audience to use their knowledge to grow their business? If so, quickly reiterate the process to take that action, and then send them on their way with an easy-to-remember homework assignment. Provide your contact information so they can let you know how the process went for them.
Do you want people to follow you on social media? If yes, then at the end of your presentation, ask audience members to pull out their mobile devices and follow you right then and there. Provide an incentive to encourage engagement.
If you want your audience to purchase your product, how can you simplify that process for them? Perhaps you can sell your goods in the lobby after your talk. If that is the case, your call-to-action should be an exciting request to join you in the lobby to check out your product firsthand.
No matter your topic, your presentation should be structured so that audience members are not left hanging, wondering what to do with their newly acquired insights.
If you choose to include a Q&A session in your presentation, do not end with the Q&A. You always want to end with a quick summary of your most important points followed by your call-to-action. To insert a Q&A before your conclusion, say something like, Before I wrap-up by telling you how to utilize these insights, I would like to open the floor to questions for two-minutes. Does anyone have any questions?
To persuade your audience to complete your call-to-action, try some of these persuasion techniques:
Summary: Use the last sentences of your presentation to deliver a clear call-to-action. Tell your audience what they should do after your presentation. In addition, offer an incentive, and create a sense of urgency.
Resources:
The Best Way To End A Professional Presentation
The Ace Up Your Sleeve: 6 Proven Methods of Persuasion
The Science of Influence – And What It Means For Your Presentations
6. Outline your slides as a storyboard.

At this point, you have done most of the heavy lifting in regards to content development. Your content might be a collection of notes and ideas, or perhaps it looks like a college essay. Either way, now is the time to organize your content in a storyboard. A storyboard is an outline that lists the words and numbers you will include on each slide, as well as notes about the design for the slide. You don’t need to start designing yet, however this is a great time to start thinking about your presentation design since that will be the next step once your storyboard is finalized.
To begin the first draft of your outline, list your three main ideas, your stories, and your call-to-action. By first jotting down these elements, you ensure that these critical components will be the focus of your presentation. Leave room in your outline to fill in the supporting ideas later.
Also, have your one sentence summary nearby and reference it regularly throughout the storyboard process. Even if you don’t state your one sentence verbatim during your talk, your audience should be able to easily grasp the central idea of your presentation. If it is appropriate to feature your one sentence summary on a slide as-is, go for it!
With these items roughly in place, focus on the content for the first few slides of your presentation. These slides are significant because you need to have a strong start to your presentation. Easing an audience into a presentation, and slowly building towards a conclusion is a recipe for mediocrity. Instead, hook your audience’s attention immediately, or risk losing them forever.
To engage your audience at the beginning of your talk, consider asking a question – either a rhetorical question, or a genuine question that includes a request for a show of hands. If you have mastered the art of humor, get your audience smiling by telling a funny story at the beginning of your presentation.
In addition, you can wake up the audience during the beginning of your presentation by revealing a shocking fact. For example, you could say, “10 years from now your job will not exist.” If you’re speaking to a group of ambitious professionals, this information will surely spark their interest.
Now that you have some ideas for the beginning of your presentation, pick a solution that seems like the best fit for your speaking style, your topic, and your audience. If you’re not sure how to start your presentation, you might need to continue researching your audience. The more you know about your audience, the easier it will be to edit and refine your slide outline.
After you develop the first few slides, continue to move through your outline by filling in the supporting ideas for your three main points. Remember that your outline should inspire the audience to take a specific action at the end of your talk. Craft your slide outline so that it builds towards your call-to-action.
In addition, when you arrange your content, try to include only one idea per slide. Keep your ideas succinct since you will need to enhance your message with a visual on each slide. This might seem excessive if you typically use bullet points or numbered lists to cram a lot of information on one slide. You might save some time on your presentation development by using bullet points, but your audience will likely be bored to tears during your presentation, and you will not be as successful with your presentation as you could be.
In 2014, the International Journal of Business Communication published the results from The Use of Visualization in the Communication of Business Strategies, an experiment conducted to gather empirical evidence regarding whether the use of visualization is better than text in the communication of a business strategy.
The results of that study confirmed that lists of text and bullet points should be avoided for presentations. Specifically, the study concluded: Subjects who were exposed to a graphic representation of the strategy paid significantly more attention to, agreed more with, and better recalled the strategy than did subjects who saw a (textually identical) bulleted list version.
In summary, bullet point lists kill presentations because your audience will struggle to pay attention to your lists, agree with your lists, and recall your lists. Those three reasons should be enough to convince you to never use bullet points again.
Once the first draft of your outline is complete, step away from your storyboard. When you are refreshed, return to your content outline and look for holes in your logic, as well as unnecessary information, or lulls in the energy of your talk.
Edit, edit, and edit again. Don’t be afraid to alter some of the foundational elements of your talk, as long as you ensure all of the critical pieces are included after your edits are complete. Also, check to make sure all of the required content pieces still fit together appropriately after your revisions to the storyboard. For example, if you decide to change one of you three pillars because it no longer resonates with you, make sure your revised pillar still fits with your one sentence summary, as well as the other two pillars and your call-to-action.
Summary: When you organize your content in a storyboard format, stay focused on your one sentence summary, your three main points, and your call-to-action. Only include supporting content that relates to these critical components. Also, craft an exciting introduction, and remember to include only one idea per slide.
Resources:
Why Bullet Points Kill Presentations (and what to do instead)
The Complete Guide to Editing Presentation Content
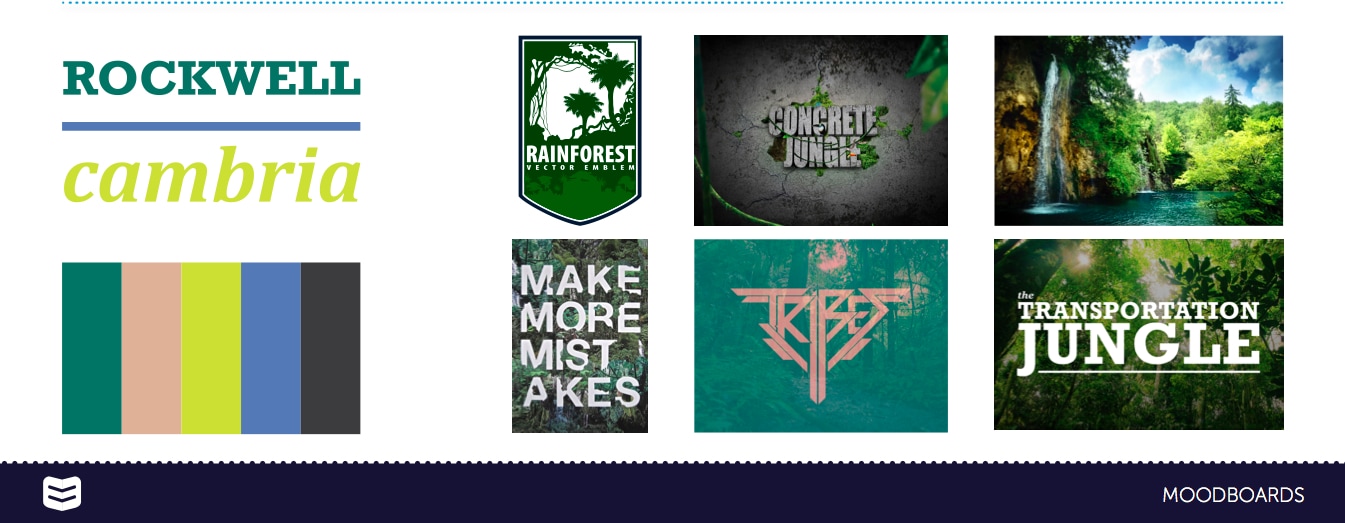
7. Create a mood board to guide your design.

Since your content is now rock solid, you can start planning your presentation design. To ensure your design is consistent and intentional, don’t launch into designing slides without first creating a mood board.
What is a mood board? A mood board is a curated collection of influences that form a map for you to follow during the design process.
Mood boards typically include a color scheme, your few selected fonts, photography style samples, icons, and a few design samples that match your ideal look and feel.

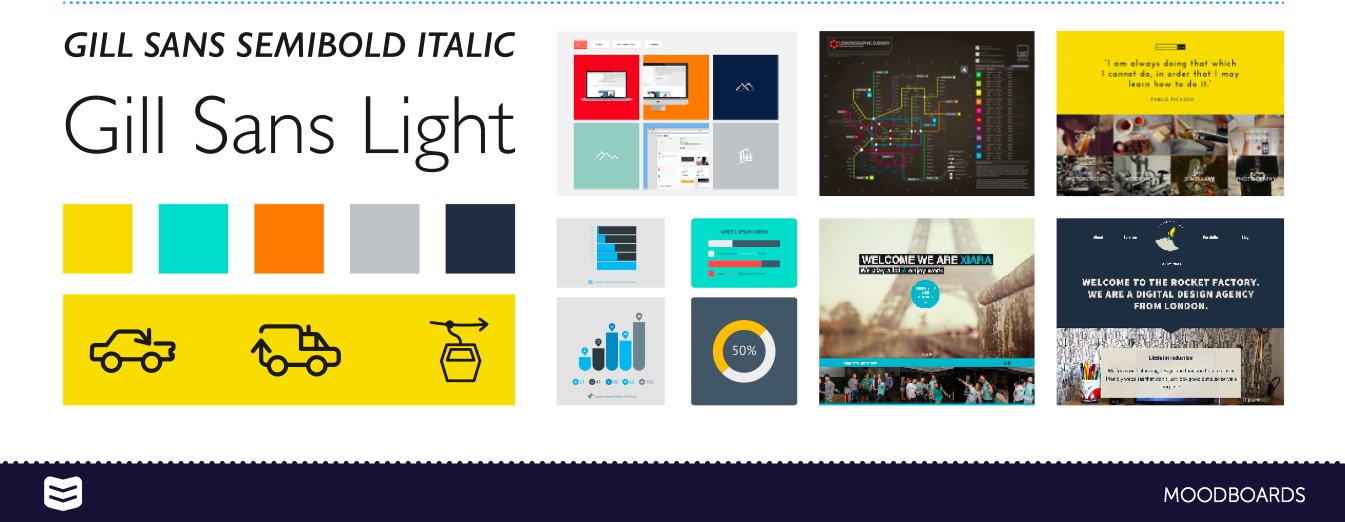
When developing your color scheme, take your time. Colors can dramatically influence the emotions and behaviors of viewers, so don’t rush and select colors impulsively. Since reactions to colors vary across cultures, genders, and ages, do your homework to know what colors are the most appropriate for your presentation, and your specific audience.
For presentations, fonts are just as important as color scheme, images, and layout. Limit yourself to using one or two fonts throughout the presentation. Too many different fonts might distract the audience, and effective fonts are something that should live in the background of your presentation. The audience shouldn’t necessarily notice them in any particular way; they should simply work with the content presented. Choose fonts that flow with the theme, narrative and content of your presentation.
Tools to Help Create Mood boards:
1. Adobe Suite (In-Design, Illustrator, Photoshop) Adobe Suite can be time intensive to learn, but allows you play with layouts and bring some of the proposed elements/inspiration into the design of the moodboard.
2. Evernote– A quick and easy way to store thoughts and images through text, recordings, and images. Both mobile and desktop versions are available.
3. Pinterest– A highly visual moodboard where you can save images from the internet to their respective “boards” or upload your own.
4. Sampleboard– An online concept creation tool that is basically a Pinterest board on steroids. It allows users to search by color, palette, or pattern and share with ease.
5. Adobe Color CC: To design with a unified color scheme, start by visiting Adobe Color CC; it is one of the best tools available for presentation designers when selecting color schemes. Both a web-based tool and a free app, Adobe Color CC allows you to explore and create infinite color schemes.
If you’re not sure how to devise a mood board with a look and feel that will resonate with your target audience, create a few mood boards and share them with colleagues who are similar to the demographic of your presentation audience. Let their preferences guide your design decision.
Summary: Just like most people create a Pinterest board before remodeling a room in their house, you need to create a mood board before designing your presentation. Carefully select fonts, colors, and inspiration pieces to build a mood board that can guide your design process.
Resources:
How To Choose Fonts For Presentation Design
Design Presentations with Consistent Color Schemes
8. Design your slides.

The slide design stage is exciting because you finally get to see your presentation blossom into a beautiful masterpiece of visual communication.
If you’re tired of working on your presentation, this is another great time to take a break and replenish your personal creative resources. If you get sloppy during the design process, you are essentially throwing away all of your hard work.
For example, if you select visuals that don’t directly support your message, your audience members will exert unnecessary mental energy trying to connect the visuals to your concept. All of the time you spent refining your content will be wasted because your audience will not be listening to you if they are too busy trying to understand your seemingly unrelated design. Visuals should simplify your message for your audience, not muddy the meaning of your presentation.
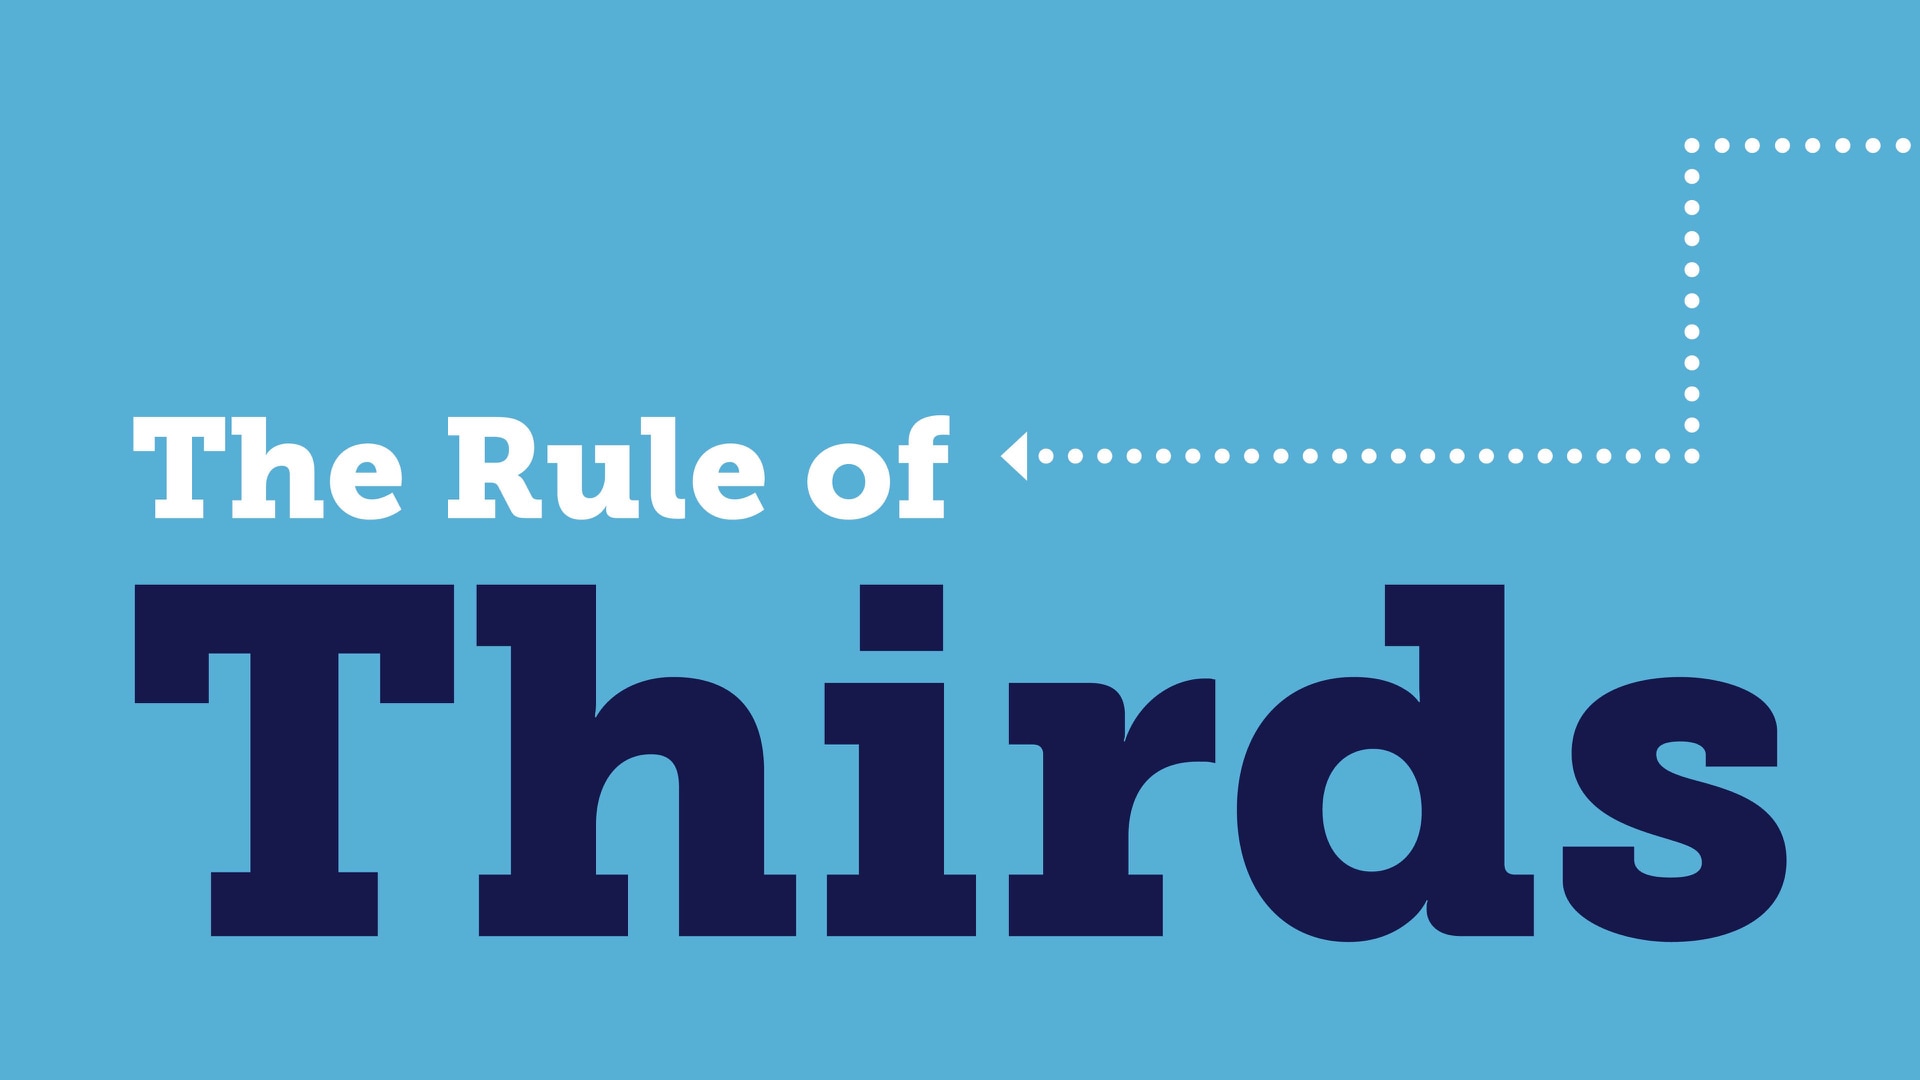
So, how can you design slides that enhance your message? Think BIG. Big visuals and big text are ideal for presentations because they keep your audience from straining to view the elements on your slides.
The slides below are good examples of big visuals and big text.
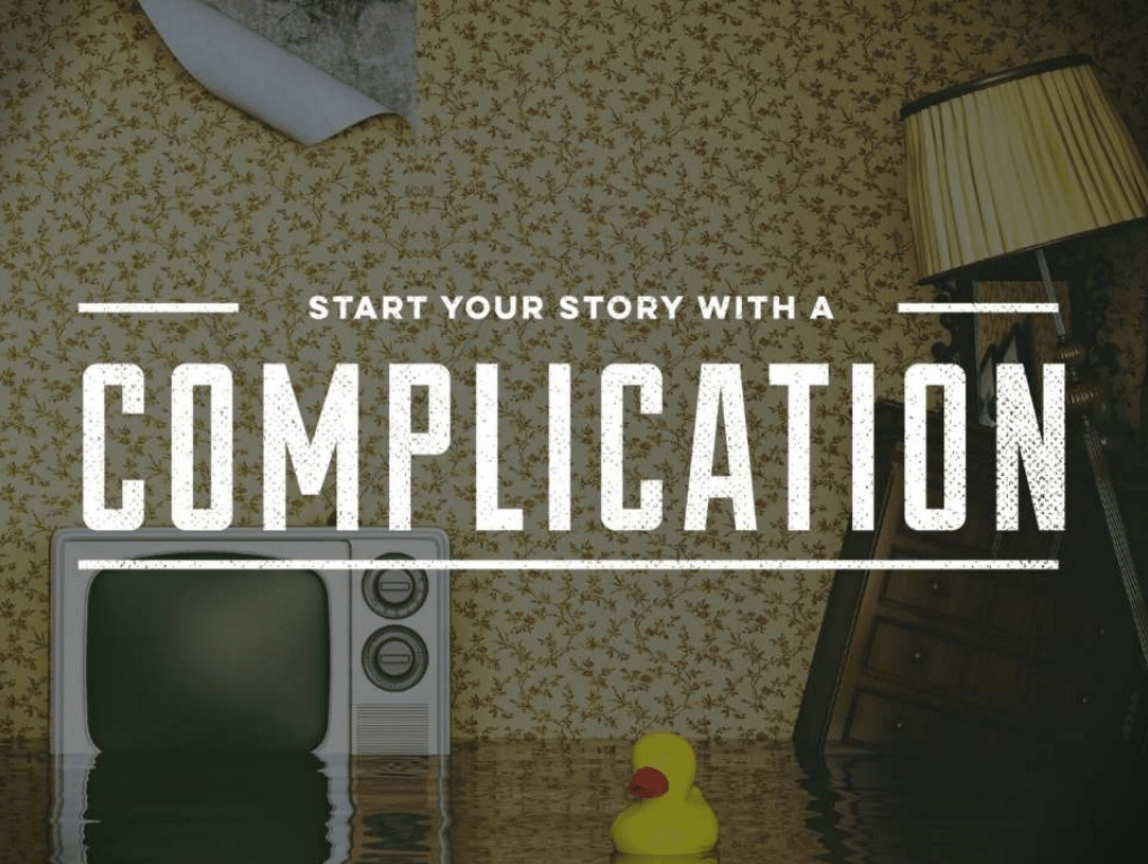

To create slides with big visuals, aim to use visual elements that can cover the entire slide. Never place a small visual in the center of your slide, and leave the rest of your slide empty. If your visual elements are low resolution and will pixelate if stretched to fill the slide, use the rule of thirds to find an appropriate place for your visual on the slide. However, if possible, avoid low-resolution elements at all costs. Low resolution visuals can quickly kill your credibility.


In addition, question every design element you choose to include. Look at your slides from the perspective of an audience member who is unfamiliar with your presentation topic. Will they understand your choice of visual elements? For example, if you want to use a photo on a slide about the power of storytelling, you might want to skip over stock photos that show someone reading a book in a library, and instead opt for a picture featuring a group of people laughing around a campfire. Yes, the images that feature someone reading in a library relate to storytelling, but they do not relate to the power of storytelling. However a photo of people telling stories around a campfire demonstrates the bonding that occurs as a result of storytelling. You need to be this nit-picky when selecting visual elements. Every detail matters when it comes to slide design.
Before you declare your presentation design complete, show your slides to a few unbiased friends who are similar in demographic to your target audience. Take their feedback seriously. If your slides don’t resonate with them, you need to make changes until the feedback is positive.
Summary: To stay on track during the design process, revisit your mood board and storyboard as you create every slide. Check to make sure you are using the correct content, fonts, colors, as well as visual elements that match your intended look and feel. Every detail matters.
Resources:
The Ethos3 Presentation Design Portfolio
Free Stock Photos To Beautify Your Professional Presentations
Create Memorable Presentations With These 2 Psychology Tricks
Subscribe To The Ethos3 YouTube channel
9. Practice with purpose.

Congratulations! If you’ve reached the practice stage, that means you have successfully written and designed your presentation.
Since there are many ways to practice for a talk, you should experiment with the different suggestions below. Find one that works for you and stick with it, or mix and match techniques to create your own unique approach. Whatever you do, don’t try to wing it. Some speakers worry that practice will decrease their authenticity on stage, however the opposite is true. A prepared speaker can focus on the audience, walk around the stage, and enjoy the moment, instead of focusing all of their attention on developing and delivering a structured and meaningful presentation on the fly.
The more you practice, the more authentic you can be on stage.
For example, if you notice that audience members are falling asleep, you can spontaneously add an interactive element to your talk, and then get back on course, because you know your material that well. If you do not know your material, being present in the moment will be nearly impossible.
As you practice your talk, don’t rehearse your content verbatim. By practicing repeatedly in a conversational style, you will naturally learn your presentation in its entirety, however you will not feel pressured to recite your talk word-for-word when you present.
If you are only practicing in front of a mirror at home, or reading your slides from the comfort of your couch, your efforts are not going to yield impressive results. Don’t hide away when you practice your presentation. Bring your presentation into the real world by practicing in front of real people, not the audience in your mind. Try to make your practice feel like the real thing, as much as possible. Do not be offended by any of the given to you during the practice sessions. Remember, you are rehearsing to work out any kinks in your talk, not to collect compliments.
To prepare for presenting in front of a mentor, colleagues, or friends and family members, first record videos of some of your private practice sessions. Remember to stand up, use your slides, and take your practice seriously.
Try to make your practice sessions feel as much like the real thing as possible. By watching recordings of your talk you can eliminate any glaring problems with your content, slide design, or delivery.
Also, take advantage of all of the benefits of your recordings by listening to some of your practice sessions when you commute to work, or walk around your neighborhood. Listening to your presentation, instead of only reading or speaking it, will give you a fresh perspective on your material.
In order to see positive results, studies have also shown that your brain must engage in “mindful” practice. This means avoiding doing the same thing over and over on autopilot without actively trying different techniques and slowly working through problems.
Summary: Practice, and then practice again and again. If you know your material inside and out, you will be able to improvise to respond to unexpected occurrences or to add a conversational tone to your presentation.
Resources:
The Complete Guide to Practicing Before a Presentation
Why You Need to Practice Before Presenting at a Conference
Memorize Your Speech With This Memory Trick
10. Own the stage.

To be a great public speaker, you need to be present in the moment during your presentation. You should be tuned into the reactions and cues from the audience, as well as focused on your material.
To be present in the moment, prepare for worst-case scenarios such as spilling coffee on your shirt before your presentation, or your laptop malfunctioning during your talk. Think through a plan for your worst fears, and bring supplies to help you survive any technical or logistical emergencies. Once you have addressed your greatest fears, let them go, and focus on being happy, confident, and focused on the present moment.
Before you take the stage, practice some power poses to raise your testosterone and lower your cortisol.
For example, stand like superman with your fists on your hips, and your chest expanded. Hold this pose for a few minutes to get the maximum effect. Power poses are proven to help you reduce stress, and increase confidence.
When you’re on stage, loosen up. Let your hands gesture naturally during your presentation. Research has shown that presenters are judged as more effective and competent when they make hand gestures compared with when they keep their hands still, according to The 4 Ways You Can Use Body Language To Influence Success by Christian Jarrett.
While gesturing, be especially aware of how you use your palms. In his TEDx talk, Body Language, the power is in the palm of your hands, Allan Pease uses humor, stories, case studies, and audience interaction to deliver a compelling case for the importance of using your palms wisely when speaking. There are more connections between your brain and the palm of your hands than any other body part, according to Pease. So clearly, the palms have evolved as an important part of human brains, Pease concludes. In one of the case studies mentioned by Pease, palm orientation was tested; the study concluded the palm up speaker had up to 40% more retention of the deal than the palm down speaker. Speaking with your palms up will make you more likable and persuasive. If you speak with your palms down, you will be perceived as threatening and controlling.
In addition, remember to smile. A recent study at Penn State University found that when you smile, you don’t only appear to be more likable and courteous, but you actually appear to be more competent, according to the TED talk, The Hidden Power of Smiling, by Ron Gutman.
Also, since you should never read from you slides, your body should be open to the audience, and your eyes should be scanning the audience. When you make eye contact with someone in the crowd, hold their gaze for a few seconds to let them know you see them, and want to connect with them. Don’t overdo it though. Keep eye contact as long as it feels natural, and then move on.
If your presentation is being filmed, look into the camera. A study between the University of Wolverhampton and Stirling discovered that viewers remembered a speaker better if they looked into the directly into the camera at least 30% of the time during a speech.
Lastly, move and pause during your presentation. Own the stage, and never stand frozen behind a podium. Adding movement to your presentation will help you keep the attention of your audience, and will also help you shake off any nerves.
Summary: Prepare for the worst-case scenarios, and then let go of your fears. When you’re on stage, be happy, enthusiastic, and connect to the audience with your eyes and body language. Whatever you do – don’t just stand there. You’re presentation matters. This is YOUR time to shine.
Resources:
What To Do With Your Hands During Presentations
The 3 Best Body Language Tips For Presentations
Fight Your Fear of Public Speaking – 4 Proven Methods
How An Improv Class Can Improve Your Public Speaking
How To Introduce Yourself Before A Presentation
Final Thoughts: 33 Presentation Tips
Conclusion
If, after reviewing the information above you still have questions or concerns about your presentation, don’t fret – we are here to help you! Send us your questions on Twitter, or contact us via email or phone.
And if you want us to come teach your team how to create and deliver captivating presentations, we would be honored to schedule a training workshop for you and your staff.
The bottom line: We are here to help you create amazing presentations!

