If we could sum up presentation design in one phrase, it might go like this: Large type, big visuals. Large type on top of big visuals grabs attention, adds visual interest quickly, and is impactful to the audience. In short: the fewer the words, the more it sticks. Here are some quick tips on how to use large type in presentations, based on a deck we designed for Amber Naslund in October 2011.

The first step to creating a slide like this is narrowing down your content. Choose only the most important information, and choose words that communicate just one thing. Don’t squash a heap of information onto one slide. Break that information up onto multiple slides. It will be much more powerful as a result.
It’s helpful to choose imagery that has empty space already built in, but if you have a large image without any extra space, bring in a simple shape to create it. In this particular case, the designer placed a triangular shape on top of the image to create space to house the large type. Avoid placing large type directly onto a busy background–– the slide will be too busy and the audience won’t be 100% clear on what’s most important.

Here’s a great example of using a simple design element to create empty space for large text. In order to make the text legible on top of this busy background, the designer darkened the image behind the text. To be more specific, the designer used a radial gradient to create a deep shadow.
Also, note the contrast between background image and text on the slide. The white text literally pops out of the slide. There’s no question as to where the audience’s eye should go because the contrast between the dark background and the large white type makes it obvious.
Here’s another great example of using a vignette, or shadow, to lighten a dark background image, thereby creating a space for the large text. It’s subtle here, but the designer lightened the background image behind the text, ensuring that the text popped out to the audience’s eye above all else.
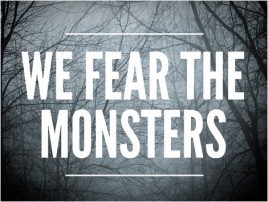
Additionally, notice the contrast created by using both thick and thin lines. The type has a thick weight while the lines that frame the text have a thin weight, creating a visually appealing contrast. It’s best to use thick weights on busy backgrounds, like in this example, while plainer backgrounds can support a type with a thinner weight.
Lastly, think about color when trying to create contrast. The text on this slide is white against a dark background, so it creates a lot of contrast, but be careful not to wash out your text on the background. For example, on the 1610 slide, the designer used black lettering against a yellow background because white lettering would have been completely washed out. Also, keep in mind that on a projector, text is going to be harder to read altogether than on a computer.

